Mindlessly scrolling through the depths of the TikTok or YouTube algorithm, you’re bound to have stumbled across one. The thocks, the clacks, the clicks—the rhythm of their fingers tapping against plastic keys. Those sounds reverberating in your ears as you lay awake in bed, wondering if this new treasure is one that you need, or simply covet. Regardless, here you are, considering getting your own, despite every fiber in your being knowing that it’s literally just a keyboard.
The world of mechanical keyboards can be daunting at first, especially with all the words thrown around by the mechanical keyboard (or as the enthusiasts call it, keeb) community. It can be overwhelming as a beginner, but once you break it all down, it’s easy enough to follow (for the most part).
There are a few reasons to get a mechanical keyboard, and to shun your old keyboard, shattering it into a million pieces as you slam it against your countertop, over and over and over, like the useless chunk of plastic it is.
Mechanical vs Membrane
Starting off, what is a mechanical keyboard? Your conventional board will likely be a membrane board, as they are cheaper to produce. A membrane board uses a layer–a membrane–beneath the keys, that when pressed registers your key presses. A mechanical keyboard, on the other hand, uses individual switches that feel a lot more tactile, as opposed to the membrane’s softer typing experience.
Mechanical switches also provide a superior experience when it comes to gaming, as its actuation is faster and just feels right. Even if you’re not a gamer, the feel of typing on a mechanical keyboard can feel so much more satisfying due to its tactility.
Customizability
The ability to customize your typing experience is a game changer. Want a board that clicks every time you press the keys? Or do you want a keyboard that is quieter? With the ability to buy the parts you want, you can tailor the keyboard to fit your preferences, whether you want something more tactile or if you just want a board to give you those satisfying thocks you hear on your TikTok For You page.
Aesthetic
Even if you’re buying a pre-built board, mechanical keyboards tend to come in better colors and designs as opposed to their membrane counterparts. This is one of the bigger draws towards getting a mechanical keyboard—they just look nice, and would be a lovely centerpiece for your gaming setup. And if you dislike the look of your board, the compatibility of parts lets you mix and match until you have a board you will regard as being perfect for you.
Furthermore, with the increasing interest in the mechanical keyboard scene, it is far more accessible to create your own board nowadays—far cheaper too. It’ll still cost you a pretty penny compared to a normal keyboard, but certainly it won’t make a dent in your wallet as much as the era of group buys and waiting an entire year for a keycaps you ordered in a group buy that costs you hundreds of dollars (this is real, people really did this).
Here’s a quick rundown of what you’ll want to look into.
Things You Need To Know
You’ll need a keycap and switch puller, and a screwdriver. That’s the barest of materials you need.
Size
The conventional keyboard with a numeric keypad is known as a full sized keyboard, while all the other sizes are referred to in percentages in reference to a full size keyboard.
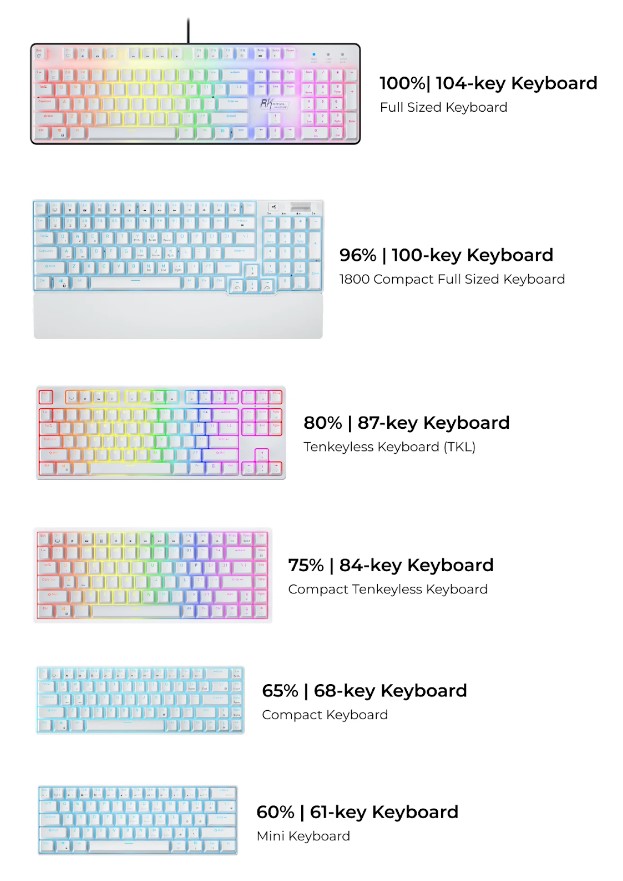
Image: Royal Kludge
A 60% is relatively popular due to its compact size, however the lack of arrow keys makes the 65% a better alternative for those seeking compactness, but not wanting to compromise on those keys. However, I would recommend a 75% keyboard for someone starting out. Unless you need the numpad, a 75% board has the perfect number of keys, since it retains the arrow keys and doesn’t ax the function row, and it is far more compact than its tenkeyless sister.
PCB
A PCB, also known as a printed circuit board, is the main thing that lets your keyboard function.
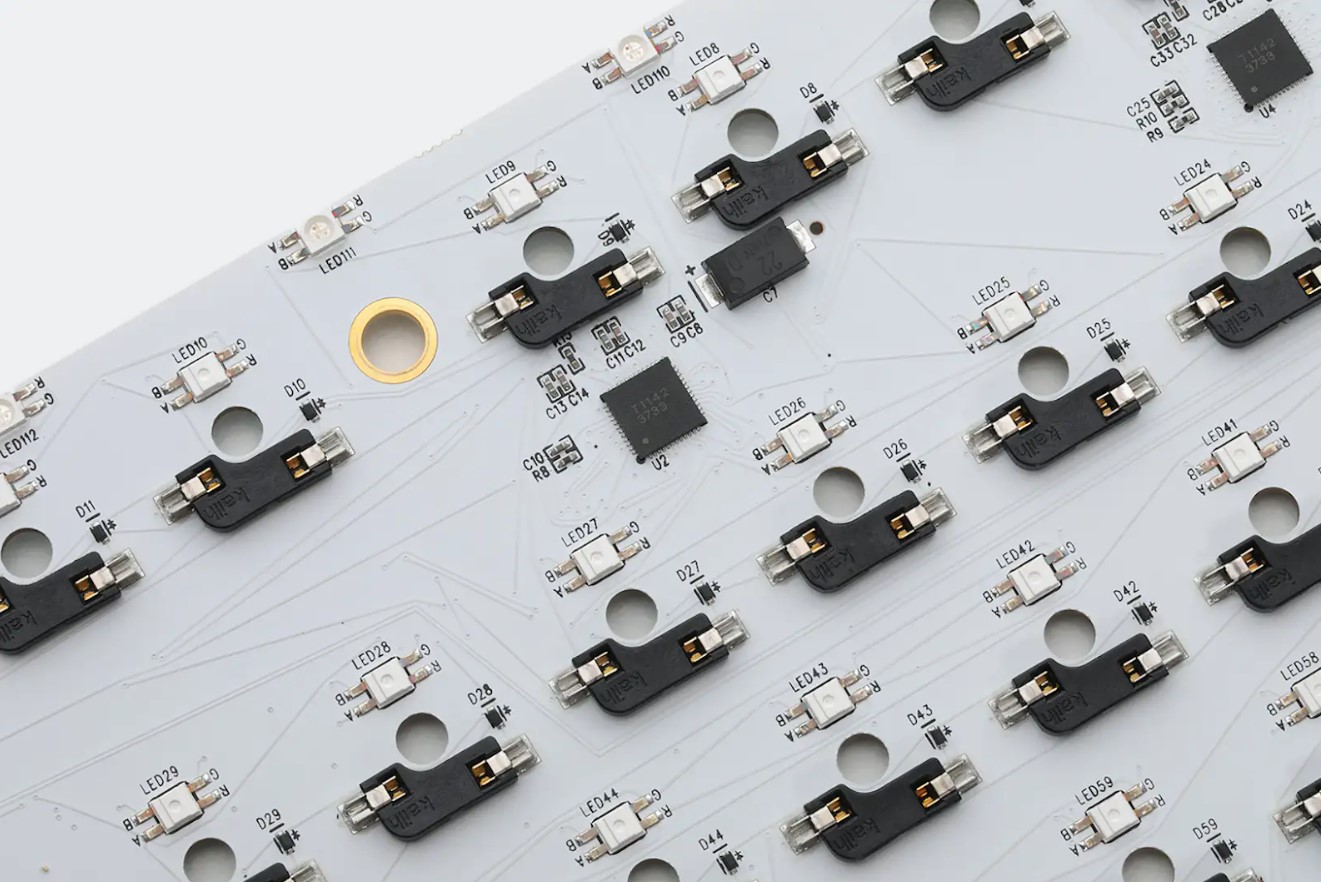
Image: Drop
North vs South
There are two kinds of PCBs to take note of—north facing and south facing. Without getting too into it, it just means which way your switch sits on the board when it's inserted into the PCB—is it facing north, or south? I would recommend getting a south facing board, since north facing boards tend to have compatibility issues with some other parts, but north facing boards are more accessible.
Soldered vs Hot Swappable
Back in ye olden days, most boards needed switches to be soldered onto the board, but over the years hot swappable boards have become, ahem, a hot item, so you don’t really need to worry about that. Hot swappable boards let you insert switches and remove them whenever you would like, as opposed to other PCBs where you would have to manually desolder and solder your new switches if you want to customize. Just make sure you get a hot swappable one if you’re starting out.
Case
Self explanatory, most mechanical keyboard sets online already come with the case, but if you only purchased a PCB, it is a good rule of thumb to make sure that the case is for the same size of keyboard as the PCB, and to make sure that the PCB is compatible with the case you’re buying. There are plenty of kinds of cases, whether they’re plastic, acrylic, metal, and they all have their own pros and cons. I would personally just recommend getting a kit that already has a PCB and case all built in, especially for a beginner.
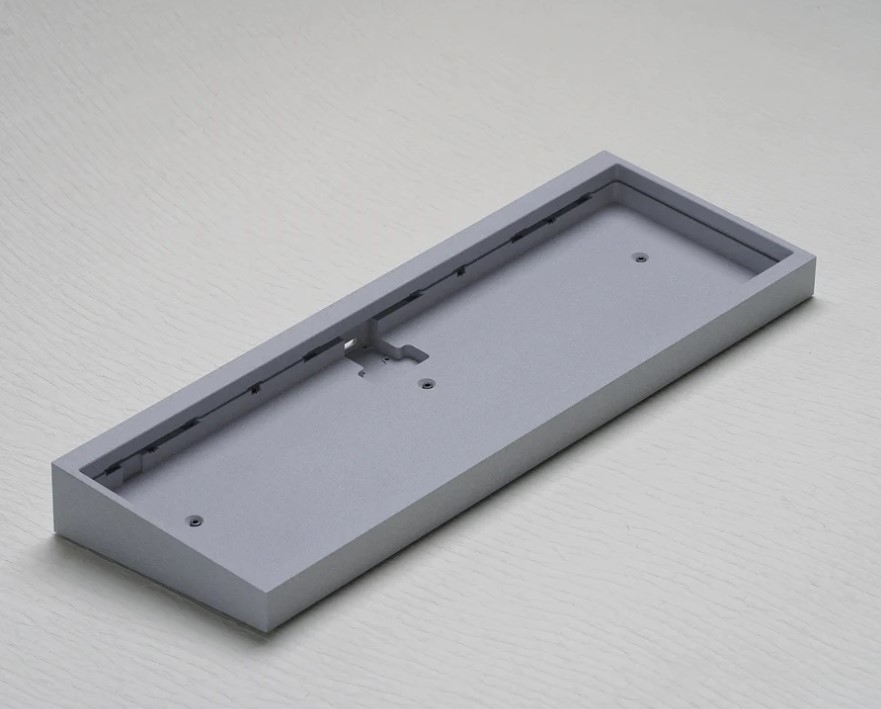
Image: KBDFans
Keycaps
Pretty obvious—these are the caps for your keys. There are a few profiles for keycaps that you’ll have to take into consideration, especially since each one offers a different sound depending on its profile (and some of them cause interference with north facing boards).
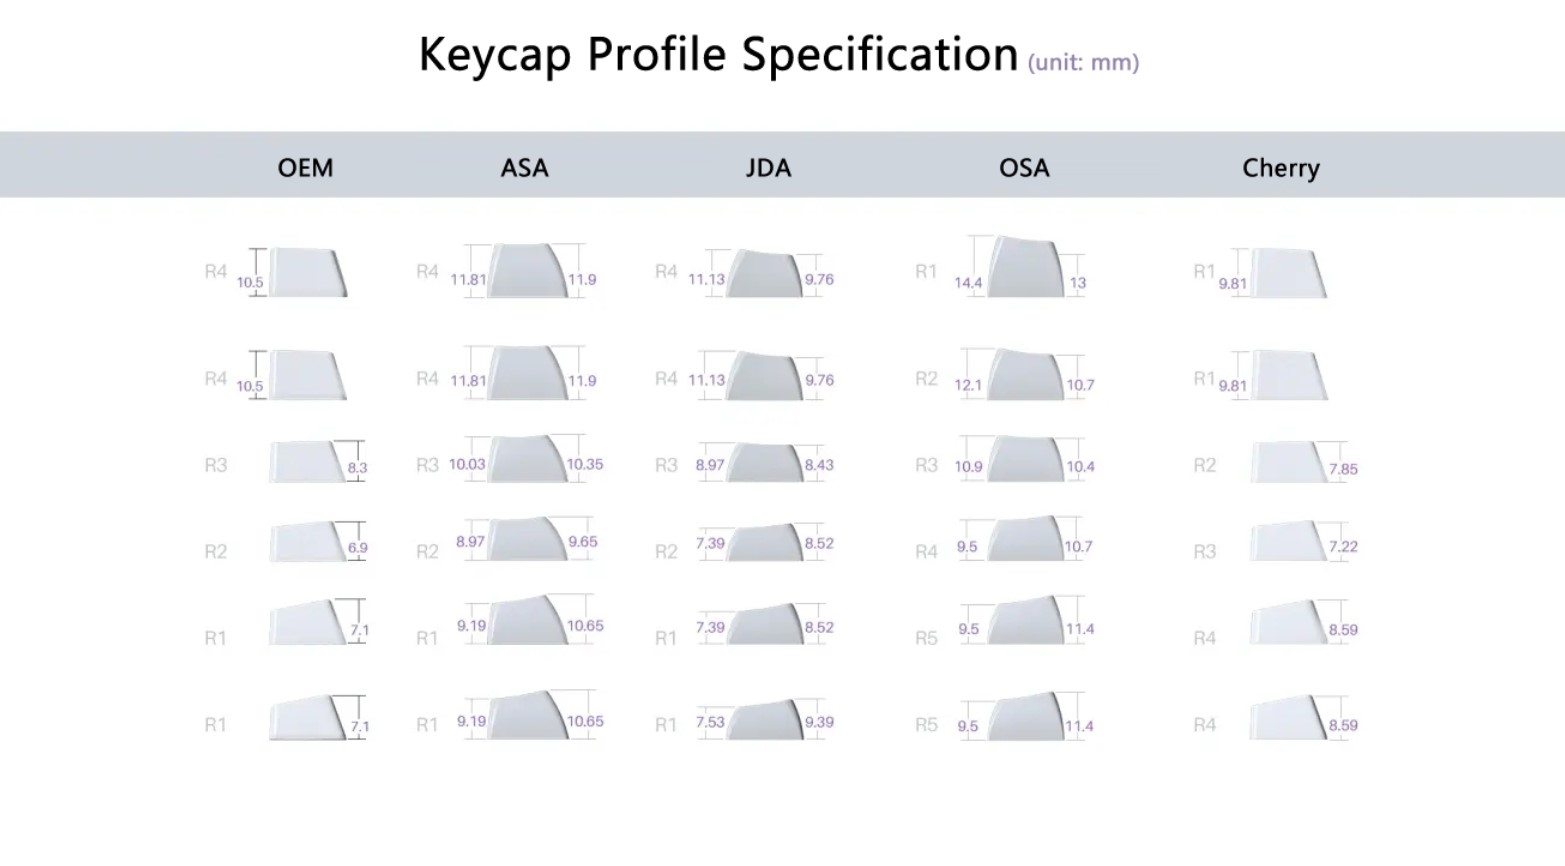
Image: Akko
Important to note, as well, is the plastic that your keycaps will come in—most commonly it’ll either be ABS or PBT. ABS tends to have brighter colors, but PBT will have less shine over time the more you type on the keys. Keycap shine is inevitable, as it’s the buildup of oils from your fingers, but PBT keycaps help mitigate that. PBT keycaps do come in good colors as well, and I think the differences are negligible enough to make PBT keycaps the superior choice.
Switches
As I mentioned, mechanical keyboards have individual switches that register each key press individually. There are three popular types, and would likely be the ones you’ll find most commonly:
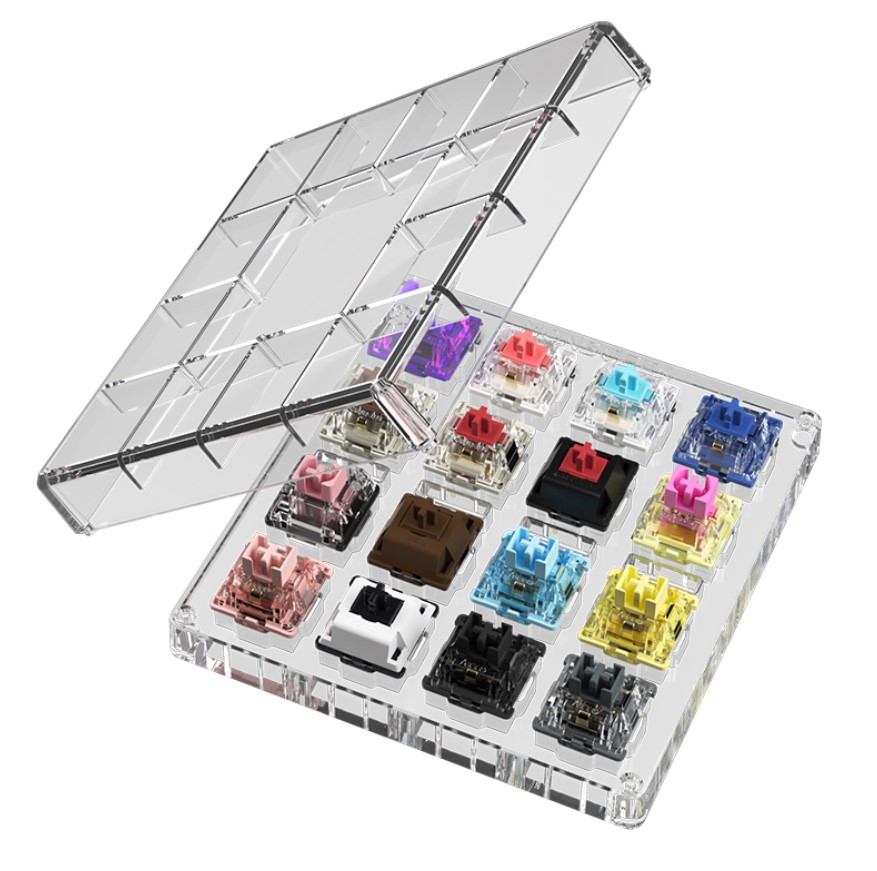
Image: Akko
Tactile has a tactile bump when you press the key. Better for typists.
Linear does not have a tactile bump when you press the key. Better for gaming.
Clicky is similar to tactile, but has a clicking mechanism whenever you press the key. Unless you’re a monster, probably don’t go for this one. It gets old quick, and you’ll inevitably alienate every housemate through the sound.
There are a lot of switches on the market, and if you want a better feel when typing, you can lube your switches (there are plenty of tutorials online), but if you’re a beginner, I think this is unnecessary. Unless you want to spend half a day painstakingly lubing each individual switch, which is also fair, and also maybe mildly cause for concern.
Stabilizers
As their name implies, stabilizers do just that—stabilize the keys that are bigger than your average keycap (backspace, enter, spacebar). Since there’s only one switch, and the stabilizers keep them from rocking back and forth and not giving you a good time. Some people clip these to make them feel better, and they also generally sound better lubed. Some boards have these pre-clipped, some don’t. It’s generally better to lube your stabilizers, at the very least, to avoid excessive rattling or a pingy noise whenever you use your spacebar.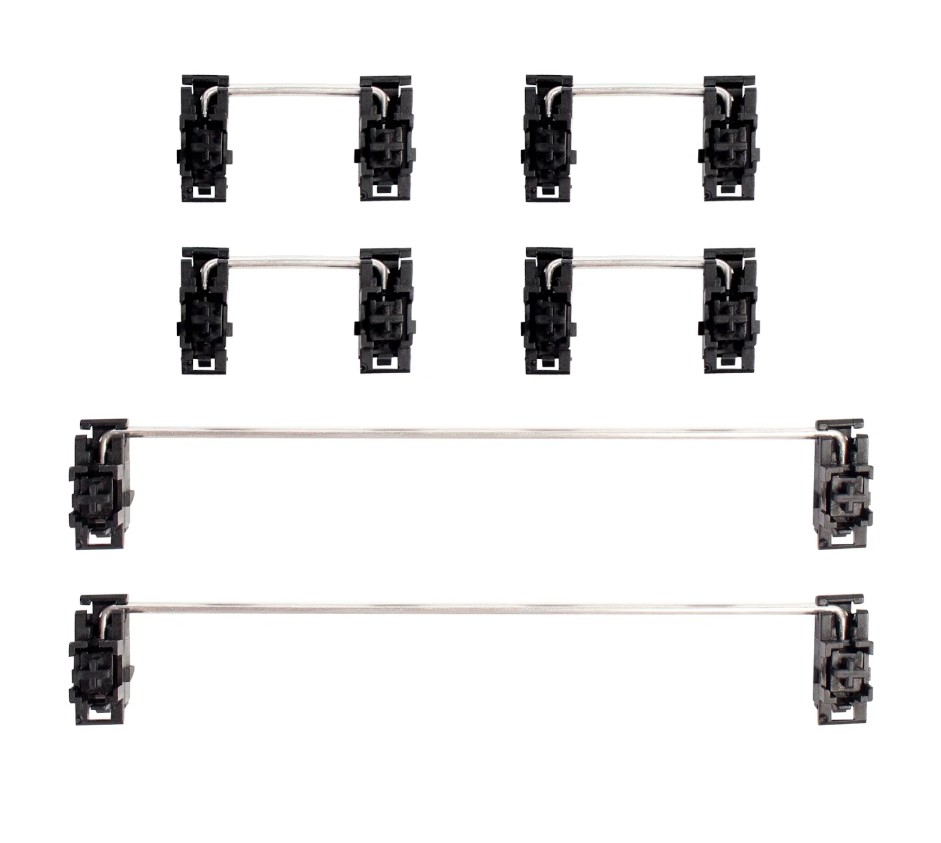
Image: Gateron
Building your board is as easy as putting it all together, and while there are other neat things to know, it can be a bit overwhelming as a first timer. I’ve cut out most of the things that aren’t really pertinent to know. Basics are more important than the insanity that is the keyboard modding scene. That comes later. With time. And obsession.
A few brands I’d recommend are Akko and Royal Kludge as they are relatively cheap and have a few prebuilt boards that are perfect for beginners.
The mechanical keyboard community is vast and welcoming—if you’re lost, you can always go on Reddit or Facebook or whatever website has a thriving mechanical keyboard community. Keyboard elitism notwithstanding, most people would be willing to help. Don’t be intimidated, and even if you decide not to make a mechanical keyboard, that’s fine. If someone makes a fuss about your membrane board, toss them overboard (don’t, actually). As long as it makes you happy, that’s all that matters.

